


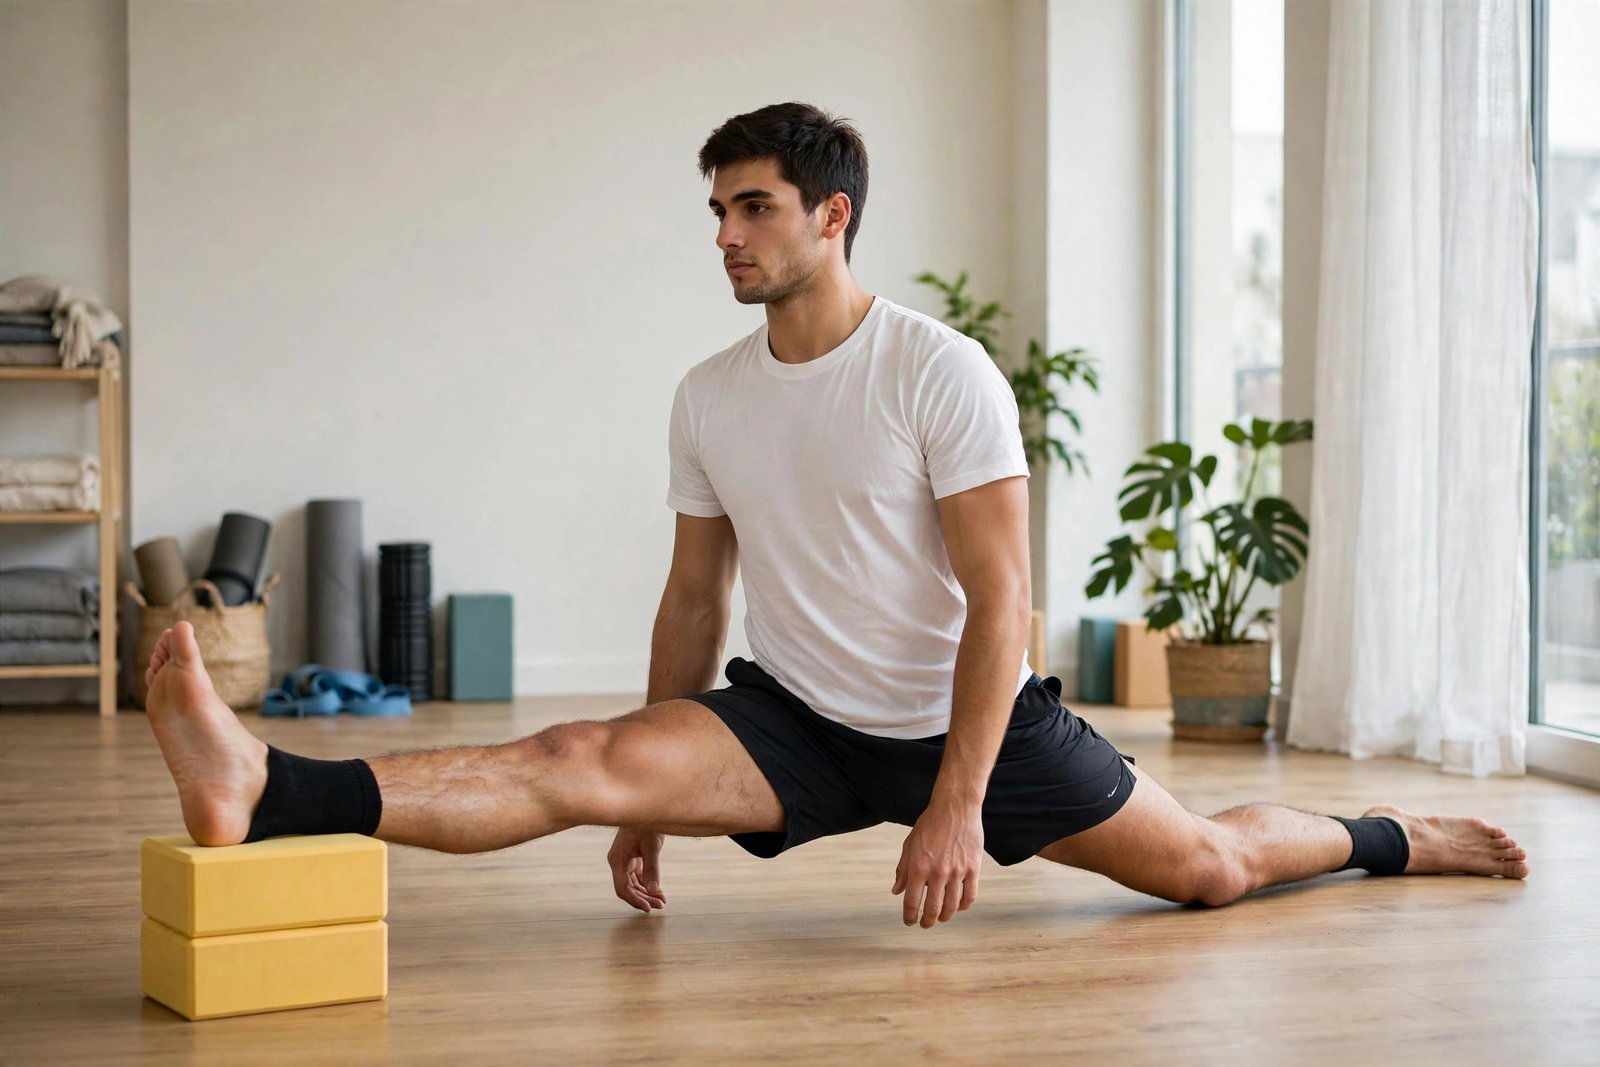
If you can already slide into a flat split, you might wonder what comes next. For dancers, gymnasts, martial artists, and serious flexibility students, the answer is often the over splits stretch. The advanced technique that pushes your legs past 180 degrees.
In fact, the over splits stretch is not a beginner move. It also builds on a solid, comfortable flat split and uses elevation, such as yoga blocks or stacked mats, to lengthen the range of motion beyond what the floor allows. Done well, it can polish your lines, deepen your flexibility, and prepare your body for elite-level skills.
Done badly, though, it can strain hamstrings, irritate the hip joint, or set your training back for weeks. This guide walks you through exactly who this stretch is for, how to set it up safely, the step-by-step technique, and how to program it so it builds you up instead of breaking you down. Then, hold each position in this over splits stretch long enough to feel the muscle release.
What Is an Over Splits Stretch?
In fact, an over split happens when your legs open beyond a flat 180-degree split. Instead of both hips resting at floor level, one or both feet are raised on an elevated surface, like yoga blocks, a mat stack, or a sturdy step. Never force a over splits stretch — ease in until you feel a gentle pull.
Because your feet sit higher than your hips, gravity pulls your pelvis down through the floor plane. In fact, the result is a split angle greater than 180 degrees — the classic “oversplit” position you see in rhythmic gymnastics, ballet, and professional dance photography. Also, breathe deeply throughout this over splits stretch for the best results.
There are two main versions. In fact, a front oversplit elevates the front foot, the back foot, or both in a front-to-back split line. In fact, a middle oversplit elevates one or both feet in a side-to-side straddle line. Each version loads different muscles, so most advanced stretchers train both. In addition, this over splits stretch works best when your muscles are warm.
In fact, the key difference from a regular split stretch is intensity. Elevation adds a significant mechanical load, and your body must already be comfortable at 180 degrees before you ask it for more. For instance, think of oversplits as graduate school for your splits: the lessons are powerful, but only after the foundations are in place. Practice this over splits stretch regularly and your range of motion will improve.
Who Is the Over Splits Stretch For?
In addition, this stretch is specifically for people who already own a flat split. If that is not you yet, start with the fundamentals in our guide on how to do the splits safely and build up from there. In fact, a over splits stretch done consistently beats an intense session done rarely.
Before adding oversplits to your routine, check that you can honestly tick off every item on this list: Hold each position in this over splits stretch long enough to feel the muscle release.
- You can sit in a flat front split on both sides (or at least the side you plan to oversplit) with square hips and relaxed breathing for 60 seconds.
- Your flat split feels easy, not like a daily battle. You can enter it without a long warm-up routine.
- Your connective tissue has had time to adapt because you have been training flexibility consistently for at least a year.
- There is no current hip, hamstring, knee, or lower-back injury, and no history of labral tears or hamstring avulsions.
- The difference between deep-stretch discomfort and sharp or pinching pain is clear to you — and you stop for the second one.
If you cannot tick every box, the over splits stretch is not for you yet. Indeed, that is not a judgment — it is a safety rule. Elevation multiplies the force on your joints, and forcing it too early is the most common way flexible people get hurt.
Why Advanced Stretchers Use Oversplits
When your flat split stops improving, oversplits give your body a new stimulus. In fact, the elevated position asks your hamstrings, hip flexors, and adductors to lengthen under slightly more tension than the floor allows. Never force a over splits stretch — ease in until you feel a gentle pull.
Dancers use oversplits to create longer, cleaner lines in leaps, extensions, and arabesques. Gymnasts and cheerleaders use them to make competition splits look effortless instead of maxed out. Martial artists use them to kick higher with control. In every case, the logic is the same: train past the range you need, so the range you need feels easy. Then, breathe deeply throughout this over splits stretch for the best results.
Oversplits also expose hidden weaknesses. In fact, many people find that their flat split looked good but relied on a tilted pelvis or a bent back knee. Elevation takes away those cheats, which forces cleaner alignment and builds real, usable flexibility. In addition, this over splits stretch works best when your muscles are warm.
Finally, there is a confidence benefit. The first time you ease into an oversplit and breathe calmly through it, your regular split feels almost restful by comparison. In fact, that mental shift matters when you perform under pressure. Practice this over splits stretch regularly and your range of motion will improve.
The Risks of Oversplits (Read This First)
Honesty matters here: the over splits stretch carries real risk if you rush it. Understanding the risks is what lets you train around them.
In fact, the hamstrings of the front leg and the hip flexors of the back leg take the biggest load in a front oversplit. In fact, a sudden slip or an aggressive push can cause a hamstring strain, which ranges from a mild pull to a partial tear that sidelines you for weeks. In a middle oversplit, the adductors (inner thighs) and the hip joint capsule absorb the force. In fact, a over splits stretch done consistently beats an intense session done rarely.
In fact, the hip joint itself deserves respect. Going past 180 degrees can compress the front of the hip or pinch soft tissue, especially if your hips are not square. People with shallow hip sockets or undiagnosed impingement are more vulnerable, which is another reason a comfortable flat split is a prerequisite, not a suggestion.
Nerves can also protest. In fact, a deep, sustained stretch near the hamstring can irritate the sciatic nerve, producing tingling or a “zinging” feeling down the leg. Indeed, that is your signal to back off immediately — nerve symptoms are never something to stretch through.
In fact, the good news: almost every oversplit injury comes from the same handful of errors. Too much elevation too soon, skipping the warm-up, bouncing, or ignoring warning pain. Every section below is designed to keep you out of those traps.
How to Set Up an Oversplit Stretch
Good setup is half the safety. You want stable, non-slip elevation at a height that challenges you without overwhelming you.
What you need
- Yoga blocks (two or more) or a stack of firm mats, books, or a low step. Blocks are ideal because the height is adjustable in small steps.
- A non-slip surface. If your blocks slide on the floor, place a yoga mat underneath everything.
- Optional: a wall or barre nearby for balance when entering and exiting the position.
Front oversplit setup
Also, place one yoga block flat under your front heel. Sit into your regular front split first, then let the elevation gently deepen it. In fact, the classic starting height is a single flat block — roughly 3 inches (7–8 cm) of elevation.
As this becomes comfortable over weeks, you can turn the block on its side for about 4 inches, or stack two blocks. Some advanced stretchers eventually elevate both the front foot and the back foot, but that is a long-term goal, not a starting point.
Middle oversplit setup
Then, place one block under each foot, keeping the heights equal so your pelvis stays level. Also, slide out into your middle split and let the elevation open the angle past 180 degrees. Because the middle split loads the inner thighs and hip capsules, keep the starting height conservative — one flat block per side is plenty.
Also, keep your toes pointing up or slightly forward and your kneecaps tracking over your toes. If your knees want to roll inward, the elevation is too high for today.
Over Splits Stretch: Step-by-Step Technique
Follow this sequence every time. In fact, the order matters — it is your safety checklist built into the movement.
- Warm up thoroughly. Spend 10–15 minutes on dynamic movement: leg swings, hip circles, lunges, and inchworms. Then hold your flat split for 60–90 seconds per side to confirm your body is ready. If your flat split feels tight today, skip the oversplit.
- Set your elevation low. Start with one flat yoga block. Adding height can always wait for next session; an injury cannot be undone.
- Enter from your flat split. Slide into your normal split position first, then place the front foot (or both feet for middle splits) onto the elevation. Never drop into an oversplit from standing.
- Square your hips. In a front oversplit, both hip bones should face forward evenly. In a middle oversplit, your pelvis should stay level and your torso upright. Film yourself from the front and side occasionally — what you feel and what is actually happening often differ.
- Support your weight. Keep your hands on the floor or on blocks beside your hips. Your arms should carry a meaningful share of your weight, especially in the first minute. Think of your hands as a dimmer switch for intensity.
- Breathe and settle. Take slow nasal breaths. On each exhale, let your muscles release a fraction deeper. Aim for stillness, not pushing. A good first hold is 30–60 seconds per side.
- Exit with control. Press through your hands, engage your core, and walk your feet back to the floor before standing. Never roll out sideways or collapse out of the position.

One more technique cue that changes everything: engage the muscles you are stretching. Gently press your front heel into the block and your back knee toward the floor, as if trying to close the split without actually moving. This light contraction, held for 5–10 seconds and then released, teaches your nervous system that the new range is safe. It is also the same principle behind PNF stretching, and it works remarkably well for oversplits.
How to Program Oversplits in Your Training
Technique gets you into the position safely. Programming — how often, how long, and how you progress — is what actually builds the flexibility over time.
Frequency and duration
Train oversplits 2–3 times per week on non-consecutive days. Connective tissue adapts more slowly than muscle, and it needs recovery time between deep-stretch sessions. Each session, perform 2–3 holds of 30–90 seconds per side after your normal flexibility work.
Total time under tension per side should stay modest at first — around 2–4 minutes. As your tolerance builds over several weeks, you can extend holds toward 2 minutes, but long, grinding holds are rarely necessary. Consistency beats marathon sessions.
The height ladder
Also, progress elevation in small, patient steps. In fact, a practical ladder looks like this:
- Weeks 1–3: one flat block (about 3 inches) under the front foot only
- Weeks 4–6: one block on its tall side (about 4 inches), or two flat blocks
- Weeks 7+: experiment with elevating both feet, or add a thin mat on top of the blocks
Only move up the ladder when the current height feels genuinely easy — calm breathing, no shaking, square hips, and no soreness the next day. If you are sore for more than 48 hours after a session, you progressed too fast.

Pairing with strength
Flexibility without strength is instability. Twice a week, add active flexibility drills alongside your oversplit work: standing split lifts, slow leg lowers from a high kick, and deep lunge pulses. In addition, these teach your muscles to control the new range, not just reach it passively.
Hip flexor and glute strength deserve special attention, since the back leg’s hip flexor is deeply lengthened in a front oversplit. Straight-leg raises, reverse lunges, and glute bridges keep the joint supported while the range expands.
Deload and maintenance
Every 4–6 weeks, take an easy week: cut oversplit volume in half or drop back to flat splits only. In addition, this planned recovery lets irritated tissues calm down and often produces a noticeable jump in range the following week.
Once you reach your target oversplit depth, you do not need to keep pushing higher. One maintenance session per week is enough to keep the range, and you can redirect that training time toward skills that use it.
Common Mistakes to Avoid
Most oversplit problems come from avoidable errors. Run through this list honestly before each session:
- Starting with too much height. Two stacked blocks on day one is the classic mistake. Start with one flat block, even if it feels easy.
- Skipping the warm-up. Cold tissue plus elevation is the fastest route to a hamstring strain. Never oversplit without 10–15 minutes of dynamic warm-up and a flat-split check.
- Letting the hips twist. An open, rotated pelvis in a front oversplit dumps the load into the lower back and SI joint. Square hips first, depth second.
- Bouncing or forcing. Ballistic pushing triggers the stretch reflex, which tightens the very muscles you are trying to lengthen — and spikes injury risk.
- Ignoring the back leg. In a front oversplit, the back leg’s hip flexor is under serious tension. If the back knee bends or the lower back arches hard, you are asking too much of it.
- Training through sharp pain. Deep stretch discomfort is normal; sharp, pinching, or tingling sensations are stop signals. There is no rep scheme worth an injury.
- Doing oversplits every day. More is not better with end-range stretching. The tissue needs 48 hours to recover and adapt.

If you recognize yourself in any of these, the fix is simple: drop the height, slow down, and rebuild. Flexibility training rewards patience far more than bravery.
When to Stop or Skip the Oversplit
Some days, the smart training decision is to skip the oversplit entirely. Treat any of the following as a firm red light:
- Sharp, pinching pain in the hip, groin, or hamstring
- Tingling, numbness, or “electric” sensations down the leg
- A feeling of instability or “giving way” in the hip or knee
- Lingering soreness from the previous session (more than mild tightness)
- Any recent hamstring, hip flexor, groin, or lower-back injury that has not fully resolved
- Training on a slippery surface or with unstable, wobbly elevation
On red-light days, do your regular flat-split maintenance or a gentle mobility session instead. You can also review the finer points of alignment in our front splits stretch guide and middle split stretch guide — clean basics make advanced work safer.
When in doubt, ask a qualified coach, physical therapist, or sports medicine professional to assess your hips and hamstrings before progressing. In fact, an expert eye can spot compensations you cannot feel.
Frequently Asked Questions
How long does it take to get an oversplit?
In addition, it depends on your starting point. If your flat split is already comfortable, most people see meaningful oversplit progress within 8–12 weeks of consistent training 2–3 times per week. Deeper oversplits — several inches of elevation — typically take 6 months or more. Tendon and joint-capsule adaptation is slow by nature, so steady patience wins.
Are oversplits bad for your hips?
Not inherently, but they demand respect. Performed with square hips, sensible elevation, and adequate warm-up, oversplits are a normal part of advanced dance and gymnastics training. In addition, they become risky when forced too early, done with twisted hips, or pushed through pinching pain. If you have hip impingement or labral issues, get professional guidance first.
Should I do oversplits before or after training?
After, or in a separate flexibility session. Deep end-range stretching before explosive activity can temporarily reduce power output, and cold oversplits are an injury risk. Warm up, do your sport or workout, then finish with oversplit work while your tissues are warm and pliable. You can also read more about sequencing in Healthline’s overview of the benefits of stretching.
Can I do oversplits if I only have a flat split on one side?
Yes — train the side you have and keep building the other side with regular split work. Asymmetrical flexibility is normal, especially for dancers who favor one leg. Just avoid the temptation to crank the “bad” side to catch up; each side progresses on its own timeline.
Do I need special equipment for oversplits?
No. Yoga blocks are convenient because the height adjusts in small steps, but stacked firm mats, thick books, a low step, or even a sturdy ottoman work fine. Whatever you use must be stable and non-slip. Then, start with about 3 inches of elevation — roughly one flat yoga block.
Why do my hamstrings shake during oversplits?
Mild shaking usually means your nervous system is working hard to stabilize an unfamiliar range — it often fades as you adapt over a few weeks. Reduce the elevation slightly, keep your hands supporting some weight, and focus on slow breathing. If the shaking is violent, or paired with sharp pain, stop the set: the intensity is too high for today.
Will oversplits help my regular splits?
Yes, and that is one of their best uses. Training slightly past 180 degrees makes a flat 180 feel like a comfortable middle ground rather than your maximum. Many stretchers find their regular split gets cleaner and easier within weeks of adding oversplits — which is exactly why coaches program them. Healthline’s guide to splits training technique covers the foundational progressions that lead up to this stage.
Conclusion
In fact, the over splits stretch is one of the most rewarding tools in advanced flexibility training. A bridge between owning your split and truly mastering it. It asks for patience, honest self-assessment, and respect for the process. It pays back with deeper range, cleaner lines, and a split that feels easy instead of maximal.
Remember the non-negotiables: a comfortable flat split first, a real warm-up every time, small elevation steps, square hips, and zero tolerance for sharp or nerve-like pain. Program it 2–3 times per week, pair it with strength work, and let consistency do the heavy lifting.
Also, start low, breathe slow, and give your body the weeks it needs. In fact, the oversplit will still be there when you are ready — and when you arrive, your regular split will feel like home.
