

In fact, the pancake stretch is one of those movements that looks effortless when a gymnast does it and feels impossible when you try it yourself. Legs spread wide, chest resting flat on the floor — it seems like a different species of human.
But here’s the truth: the pancake stretch is a trainable skill, not a gift. With the right technique and a patient, staged approach, almost anyone can work their way from an upright, uncomfortable straddle to a deep, relaxed chest-to-floor fold. In addition, this guide covers everything — proper form, the muscles involved, common mistakes, and a full pancake stretch progression you can follow step by step.
What Is the Pancake Stretch?
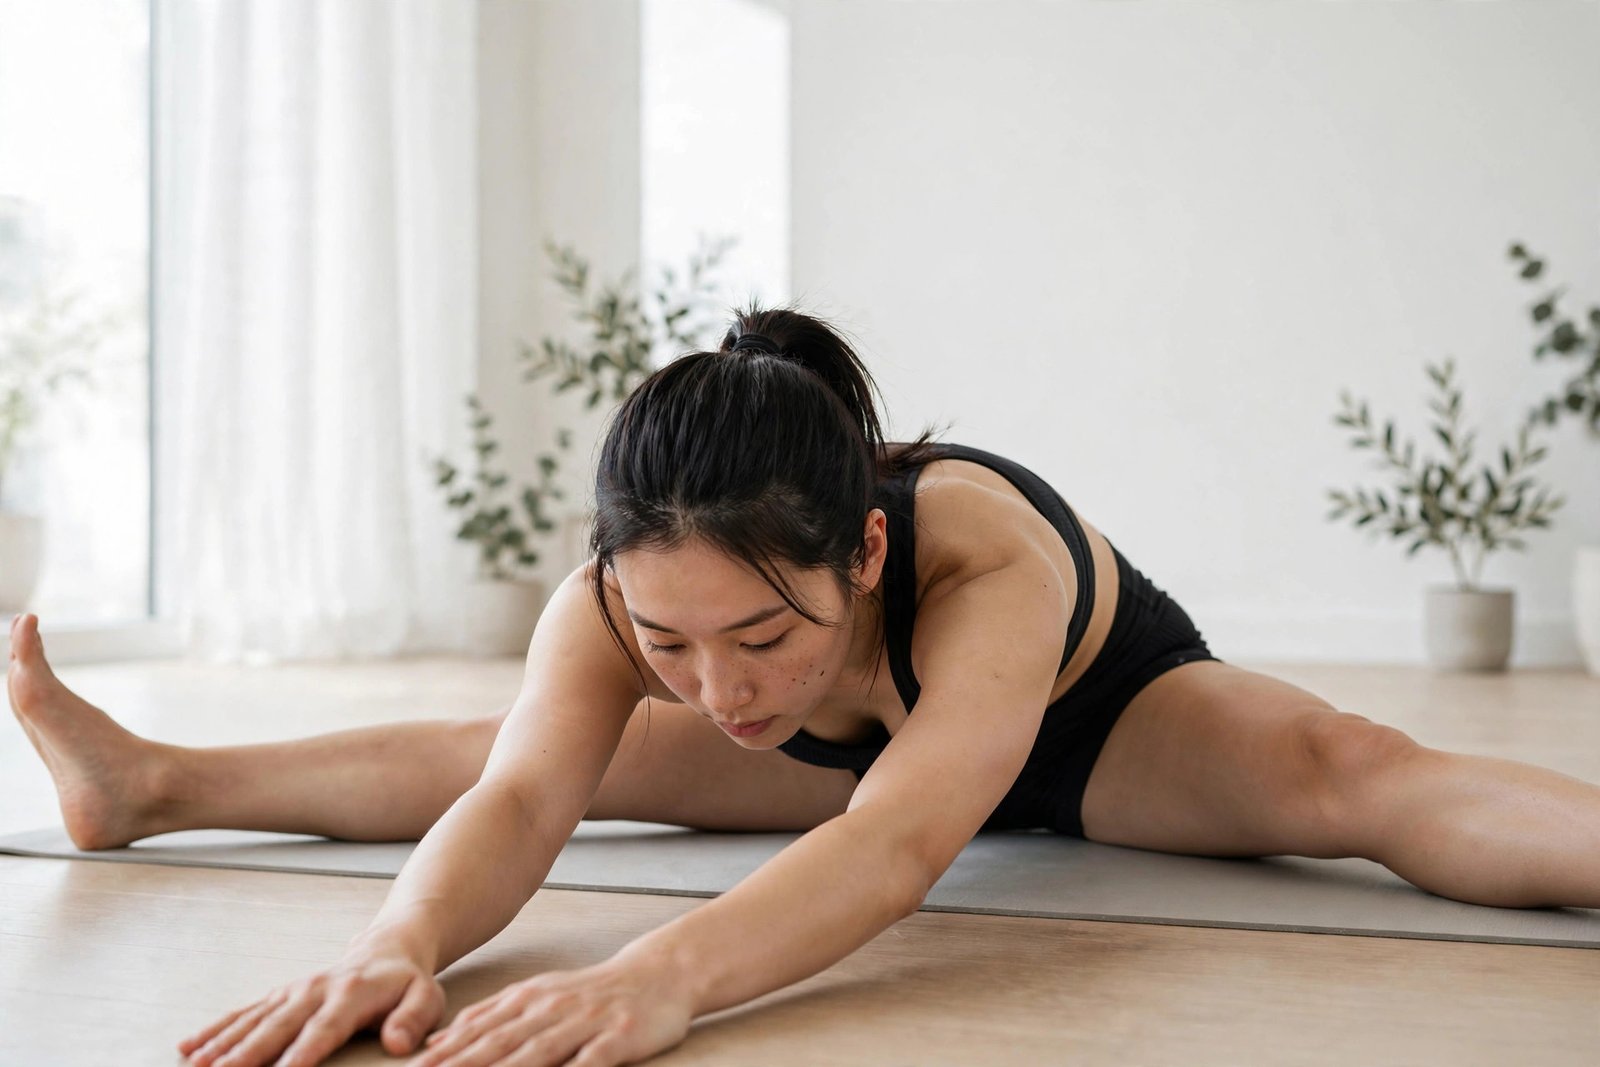
In fact, the pancake stretch is a seated flexibility movement where you spread your legs wide into a straddle position and fold your torso forward until your chest touches. Or nearly touches — the floor between your legs. It gets its name because, done correctly, your body flattens out like a pancake.
It’s a staple in gymnastics, martial arts, and dance training, and it also appears in yoga as Upavistha Konasana (wide-angle seated forward fold). In yoga, the fold is usually gentler. In fact, the gymnastics-style pancake pushes for maximum depth, with a flat torso and straight legs.
Pancake Stretch vs. Straddle vs. Middle Splits
In addition, these terms get mixed up constantly, so let’s clear it up. In fact, a straddle is simply the seated position with legs spread wide — no folding required. The pancake stretch starts from that straddle and adds the deep forward fold. The middle splits, on the other hand, is an upright position where you lower your hips toward the floor between your legs.
They’re related but different skills. In fact, the pancake builds the adductor and hamstring length you need, which carries over beautifully to middle splits. Many people train both together. If your bigger goal is a flat middle split, our guide to the middle split stretch pairs perfectly with the pancake work below.
Muscles Worked and Benefits of the Pancake Stretch
In fact, the pancake stretch is a multi-muscle movement. In fact, the primary muscles under stretch are your adductors — the inner-thigh muscles that pull your legs together. They’re the main limiter for most people. In fact, your hamstrings take a significant load too, especially if your legs are long relative to your torso.
Secondary players include the glutes, the erector spinae along your lower back, the hip flexors, and even the calves. The lower back also works isometrically to keep your torso from collapsing, which is one reason the pancake feels harder than it looks.
The benefits go well beyond looking impressive on a gymnastics mat:
- Deeper hip mobility: The pancake opens the hips in the frontal plane, a direction most daily movement never trains.
- Middle split carryover: Longer adductors and hamstrings transfer directly to wider, safer middle splits.
- Better posture: Learning to hinge at the hips with a flat back teaches your body to fold from the hips, not round from the spine.
- Lower-back relief: Tight adductors can tug the pelvis out of position. Releasing them often eases nagging lower-back stiffness.
- Injury resilience: Flexible, strong muscles through a full range of motion handle surprise movements — slips, lunges, awkward landings — far better than stiff ones. This lines up with the widely reported, research-backed benefits of stretching.
- Athletic performance: Martial artists, dancers, gymnasts, and figure skaters all rely on pancake mobility for kicks, leaps, and landings.
How to Do the Pancake Stretch
Form matters more than depth. In fact, a sloppy pancake teaches bad habits and invites injury. Follow these steps every time you practice.
Step 1 — Sit tall in a straddle. Sit on the floor with your legs spread comfortably wide — not your absolute maximum. Also, keep your knees pointing toward the ceiling and your toes flexed (pulled back toward you). Also, sit on a folded blanket or yoga block if your hips feel stuck; elevating your hips makes the hinge much easier.
Step 2 — Hinge, don’t round. This is the most important cue in the entire movement. Before folding, tilt your pelvis forward so your lower back stays flat. Think about leading with your chest, not your head. If your back rounds the moment you lean forward, you’re going too far — pull back until your spine is straight again.
Step 3 — Walk your hands out. Place your hands on the floor in front of you and walk them forward a few inches at a time. Then, let your torso follow your hands. Also, stop at the point where you feel a firm stretch in your inner thighs and hamstrings — around a 6 or 7 out of 10 intensity. Breathe deeply here.
Step 4 — Deepen with the breath. On each exhale, see if your hands can slide another inch forward. Never force or bounce. In fact, the goal is relaxed, sustained pressure — your muscles need time to feel safe enough to release.
Step 5 — Hold and release slowly. Hold your deepest comfortable position for 30 to 60 seconds, then walk your hands back and sit up. Repeat for 3 rounds. When you stand up, do it gently — give your back a moment before bending or twisting.

Quick Form Checklist
- Knees point up toward the ceiling, not inward or outward.
- Legs stay straight but not aggressively hyperextended.
- Toes flexed (or pointed — pick one and stay consistent within a session).
- Spine stays as flat as possible; fold comes from the hips.
- Breathing stays slow and deep — never hold your breath.
- Stretch intensity around 6–7 out of 10. Sharp pain means stop immediately.
The Complete Pancake Stretch Progression
Getting your chest to the floor doesn’t happen in a single stretch — it happens in stages. In addition, this pancake stretch progression takes you from total beginner to full chest-to-floor. Spend 2 to 4 weeks at each stage (or until you meet the exit standard), then move on. Rushing stages is the number one reason people stall.

Stage 1: Elevated Upright Straddle (Weeks 1–3)
Most beginners can’t even sit upright in a wide straddle without their back rounding. In fact, that’s completely normal — and it’s exactly what this stage fixes. Then, sit on a yoga block, thick book, or folded blanket so your hips are 4 to 6 inches above the floor.
Spread your legs to a comfortable width, flex your toes, and simply practice sitting tall with a flat back for 2 minutes. Also, press your knees gently toward the floor without forcing them. In addition, this builds basic adductor tolerance and teaches your pelvis how to tilt forward.
Exit standard: Sit tall for 2 minutes with a flat back and no blanket, legs in a moderate straddle.
Stage 2: Supported Forward Fold (Weeks 3–6)
Now add the fold. From your straddle, place your hands on the floor (or on two yoga blocks) in front of you and walk them forward until you feel a moderate stretch. Also, keep your arms straight and your back flat. Think of it as a plank position for your upper body — your arms support your weight while your torso hinges forward.
Then, hold for 30 to 45 seconds, rest, and repeat 3 times. Each session, try to walk your hands half an inch farther. If your back starts rounding, you’ve gone too far. That rounding is your body’s way of stealing range from your spine because your hips aren’t ready.
Exit standard: Fold forward with straight arms and a flat back until your torso is roughly 45 degrees from the floor, holding comfortably for 60 seconds.
Stage 3: Fists and Forearms to the Floor (Weeks 6–10)
As your range improves, lower your support. First, fold until your fists rest on the floor. Then work toward forearms. At this stage, your elbows will bend and your chest will start dropping between your thighs. Also, keep driving your chest forward rather than collapsing downward — forward, not down.
Indeed, this is where breathing becomes your superpower. Take a slow inhale, then on the exhale, consciously relax your inner thighs and let gravity pull you a fraction deeper. In fact, many people find that 5 to 10 slow breath cycles unlock more range than 5 minutes of straining.
Exit standard: Rest both forearms flat on the floor with straight legs and a relatively flat back, holding for 60 seconds.
Stage 4: Deep Fold — Belly Toward the Floor (Weeks 10–16)
From forearms, continue folding until your belly button approaches the floor. In fact, your legs may want to widen — that’s fine and expected, but keep your knees pointing up and your feet active. At this depth, add gentle loaded stretching: place a light weight (a 5–10 lb plate or sandbag) on your mid-back for 20 to 30 seconds per set. Light load teaches your nervous system that the deep position is safe.
You can also try contract-relax (PNF) work here. In your deepest comfortable fold, press your legs outward into the floor as if trying to spread them wider for 7 seconds, then relax and sink deeper. Two or three rounds of this can produce surprising same-day gains.
Exit standard: Belly touches the floor with straight legs, holding for 30 seconds without pain.
Stage 5: Full Chest-to-Floor Pancake (Weeks 16+)
In fact, the final stage: from your straddle, hinge forward and lay your entire torso. Belly and chest — flat on the floor, arms extended in front of you. Indeed, this is the classic gymnastics pancake. Don’t chase this with marathon holds at first. Instead, accumulate time: several 20–30 second holds with full relaxation between sets.
Maintenance matters once you arrive. Flexibility is use-it-or-lose-it. Two short pancake sessions per week will keep your chest-to-floor pancake for years. Also, stop training it entirely, and you’ll slowly lose depth over a few months.
A note on timelines: These week ranges are honest averages for someone training 3 to 4 times per week. Younger athletes and naturally flexible people may move faster. Adults starting from a desk job may need longer — and that’s fine. Consistency beats intensity every time. Additionally, for a broader roadmap if splits are your end goal, see our step-by-step guide on how to do the splits.
Common Pancake Stretch Mistakes to Avoid
Mistake 1: Rounding the back from the start. The moment your lower back rounds, you’ve stopped stretching your adductors and started hanging on your spinal ligaments. Fix it by sitting on an elevation, narrowing your straddle, or simply folding less far until you can keep a flat back.
Mistake 2: Bouncing to go deeper. Ballistic bouncing triggers your stretch reflex — your muscles contract to protect themselves, which is the opposite of what you want. Smooth, sustained pressure always wins.
Mistake 3: Going maximally wide too soon. A narrower straddle with a flat back and real hip hinge stretches more effectively than a huge straddle with a rounded spine. Widen gradually as your hinge improves.
Mistake 4: Letting the knees cave or rotate. Knees should point straight up. If they roll inward, your hip rotators are compensating. Reduce the width and actively think “kneecaps to the ceiling.”
Mistake 5: Stretching cold. Muscles stretch best when warm. In fact, a pancake session on cold tissues is both less productive and riskier. Always warm up first (drills below).
Mistake 6: Chasing pain. Discomfort is part of stretching; sharp, stabbing, or pinching pain is not. Pain near the sit bones or deep in the groin is a signal to back off, not push through.

How to Program the Pancake Stretch
Flexibility responds to frequency more than marathon sessions. In fact, the American Council on Exercise’s flexibility training guidelines recommend stretching major muscle groups at least 2 to 3 days per week, with daily work being even better — and the pancake fits that prescription perfectly.
A simple weekly template looks like this:
- 3–4 sessions per week, 10 to 15 minutes each, ideally after a workout or any time your body is warm.
- Warm-up (3 min): pick 2 drills from the list below.
- Main work (7–10 min): work at your current progression stage — 3 to 4 holds of 30 to 60 seconds, or 2 to 3 rounds of contract-relax.
- Cool-down (2 min): lie on your back and hug your knees to your chest, or do a gentle child’s pose to release the lower back.
Track your depth with a simple landmark: fists on floor, forearms on floor, elbows on floor, belly on floor, chest on floor. When you graduate a landmark, you know the program is working.
Warm-Up Drills That Make the Pancake Easier
Then, do 2 of these before every pancake session. Your adductors will thank you.
Standing straddle good mornings (10 reps). Stand with feet wide, hinge at the hips, and lower your torso toward the floor with a flat back. In addition, this grooves the exact hip-hinge pattern the pancake needs, just in a friendlier position.
Horse stance holds (3 × 20 seconds). Sink into a wide squat stance with feet turned out. In addition, this loads the adductors in a lengthened position and builds the strength that makes flexibility stick.
Seated leg swings (10 per leg). Sit in your straddle and gently swing your torso side to side, reaching toward each foot. Dynamic movement warms the tissues faster than static holds alone.
Wall straddle (2 minutes). Lie on your back with your legs up a wall and let them fall open. Gravity does the work, and it’s one of the gentlest ways to open the adductors. We cover the details in our wall straddle stretch guide.
Frequently Asked Questions
Is the pancake stretch the same as a straddle stretch?
Not quite. In fact, the straddle is the seated position with your legs spread wide. In fact, the pancake stretch starts from the straddle and adds a deep forward fold until your chest approaches the floor. Think of the straddle as the setup and the pancake as the full movement.
How long does it take to get a chest-to-floor pancake?
For most adults training 3 to 4 times per week, expect 4 to 6 months from a stiff starting point to a full chest-to-floor pancake. People with a gymnastics or dance background may get there in weeks. In fact, your hip structure plays a role too — some pelvises simply allow more range than others. In fact, the progression stages above are a realistic map, not a race.
How often should I do the pancake stretch?
Three to four times per week is the sweet spot for steady progress. Daily gentle work is fine too, as long as you keep the intensity moderate on most days and save the hard pushing for 2 or 3 sessions. Flexibility gains come from accumulated time in the position over weeks and months.
Does the pancake stretch help with middle splits?
Yes, enormously. The pancake develops the exact adductor and hamstring length that middle splits demand, while also teaching you to control your pelvis. Many coaches consider the pancake a prerequisite drill for middle splits. Train them together and both improve faster.
Should my knees be straight during the pancake stretch?
Ideally yes, but “straight” doesn’t mean locked out with force. Then, keep your legs extended with your kneecaps pointing up, but allow a micro-softness in the knee if locking them causes pain behind the joint. As your hamstrings lengthen, fully straight legs will feel natural.
Is it bad if my back rounds during the pancake?
In fact, a little rounding at your absolute end range is normal and not dangerous by itself. In fact, the problem is rounding from the start, which shifts the stretch away from your adductors and onto your spinal ligaments. Prioritize a flat back at moderate depth over a rounded back at extreme depth — the depth will come as your hips open up.
Can beginners do the pancake stretch?
Absolutely — that’s exactly what Stage 1 of the progression is for. Sitting on a raised surface with a narrow, comfortable straddle is a genuine pancake stretch variation. You don’t need to be flexible to start; you start to become flexible.
Conclusion
In fact, the pancake stretch looks like a party trick, but it’s really a patient practice in hip mobility. Also, start with an honest assessment of where you are, follow the stages in order, keep your back flat, breathe into the stretch, and show up 3 to 4 times a week. The chest-to-floor fold that seems impossible today becomes inevitable with enough consistent, intelligent work.
Remember the principles that carry you there: hinge before you round, relax instead of forcing, warm up every session, and respect pain signals. Flexibility built this way doesn’t just look good — it lasts. Now sit down, spread those legs, and take the first small fold toward your pancake.
