


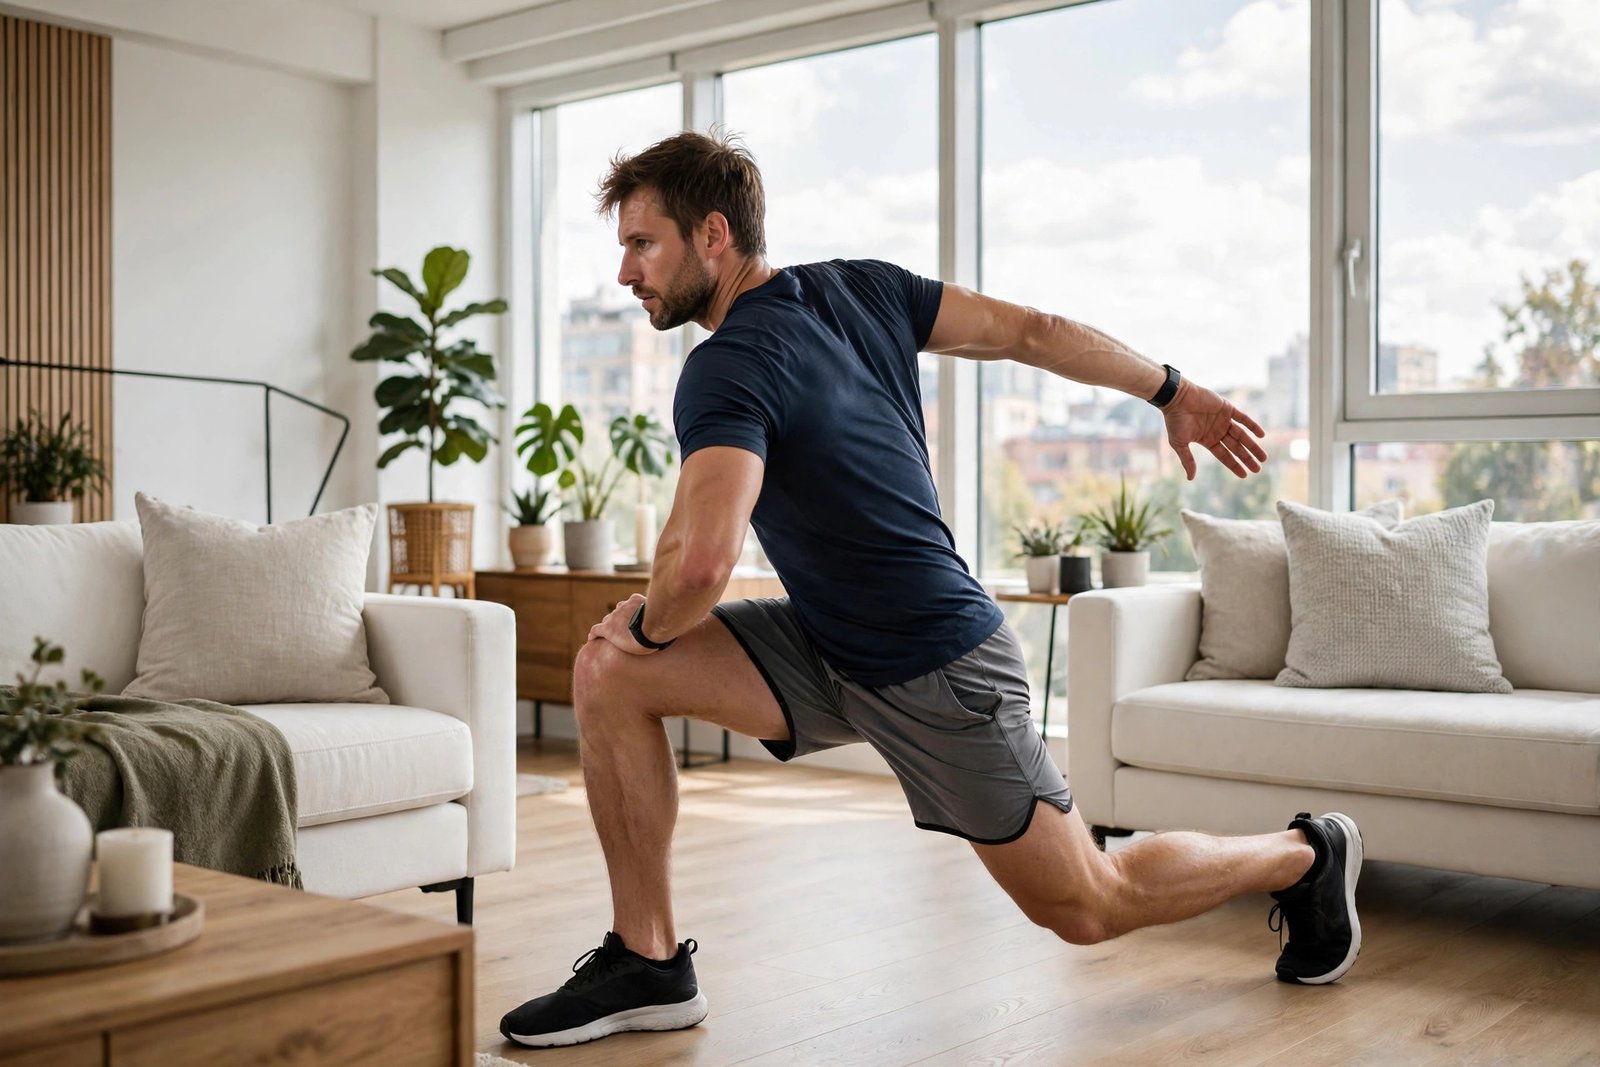
If you only have five minutes to move your body, the world’s greatest stretch is arguably the smartest way to spend them. This single flowing drill opens your hips, hamstrings, spine, and chest in one continuous sequence, and for that reason it has become a favorite warm-up among athletes, trainers, and physical therapists alike. Moreover, it requires no equipment at all, so you can do it in your living room before your morning coffee.
Maybe you have seen the name online and wondered whether it lives up to the hype. Indeed, the bold title promises a lot, and it is completely natural to feel skeptical. In this guide, you will learn the full 6-part sequence step by step, and in addition, you will get beginner-friendly regressions and progressions that most other guides simply skip.
What Is the World’s Greatest Stretch?
However, despite the dramatic name, the world’s greatest stretch is not one stretch at all. Instead, it is a flowing series of six linked positions that you move through on each side of your body. Firstly, you step into a deep lunge, and then you rotate, reach, and extend through several shapes before standing back up.
The drill was popularized in strength and conditioning circles as a time-efficient warm-up. Physical therapist Sasha Cyrelson describes it as a series of six or seven stretches, each held for five to seven seconds, that flow together in a memorable sequence (Refinery29’s breakdown of the drill). Consequently, it feels less like a rigid routine and more like a short movement meditation.
You may also see it called the WGS for short. However you say it, the idea is the same: one drill, many joints, very little time. Consequently, it shows up in warm-ups for runners, lifters, team-sport athletes, and weekend warriors everywhere.
Why the World’s Greatest Stretch Earns Its Name
While the nickname sounds like marketing, there is real logic behind it. Most stretches target one muscle group at a time, whereas the world’s greatest stretch chains several of them into a single flowing movement. Indeed, one repetition touches your hip flexors, hamstrings, glutes, inner thighs, calves, chest, upper back, and obliques.
That full-body coverage is exactly why coaches love it. Additionally, the sequence blends mobility work for your ankles, hips, and thoracic spine, which are the three areas that tend to stiffen up first when you sit all day. Therefore, five minutes of this drill can undo hours of desk posture.

It also works as both a dynamic warm-up and a gentle static routine. When you flow quickly through each position, blood flow increases and your nervous system wakes up. However, when you hold each shape for 15 to 30 seconds, it becomes a calming flexibility session. Similarly, you can slow it down after a workout or speed it up before one.
Finally, the learning curve is kind. The shapes are simple, the transitions feel natural, and you can make every part easier or harder. Indeed, that adaptability is the main reason this guide includes regressions and progressions for every single part.
The 6-Part World’s Greatest Stretch Sequence
Here is the complete sequence. You will perform all six parts on one side, then repeat everything on the other side. When using it as a dynamic warm-up, hold each position for about five to seven seconds while breathing steadily.
Before you begin, stand tall with your feet hip-width apart. Firstly, take one slow breath in through your nose and out through your mouth. Additionally, give yourself enough floor space to step forward into a lunge without hitting furniture.
Part 1: The Deep Lunge
Firstly, step your right foot far forward and lower into a deep lunge. Meanwhile, keep your back leg straight with your heel pressing toward the floor, and place both hands on the floor inside your front foot. Your front knee should track over your ankle rather than collapsing inward.
Indeed, you should feel a gentle pull along the front of your back hip and thigh. Additionally, as a beginner regression, drop your back knee to the floor and rest your hands on your front thigh instead of the floor. Similarly, as a progression, keep the back knee hovering one inch off the floor while you sink deeper into the lunge.
Part 2: Elbow to Instep
From the deep lunge, lower your right elbow toward the inside of your right foot. Let your torso sink between your legs as your elbow drops, and keep your back leg long behind you. This position opens the inner thigh and groin while deepening the hip stretch.
However, do not force your elbow to touch the floor on day one. Additionally, as a beginner regression, place a yoga block or thick book under your elbow and rest on it. Similarly, as a progression, press your elbow down until it lightly touches the floor, then add a small pulsing sink for three counts.
Part 3: Thoracic Rotation, Arm to the Sky
Keep your right hand on the floor and sweep your left arm up toward the ceiling. Rotate your chest open so your torso twists over your front leg, and follow your top hand with your eyes. You should feel your chest, upper back, and obliques wake up immediately.
Indeed, this rotation is the heart of the world’s greatest stretch, because thoracic mobility is what most of us lose first. Additionally, as a beginner regression, keep your top hand at shoulder height or rest it on your front knee. Similarly, as a progression, pause at the top for three full breaths, reaching a little taller with each exhale.

Part 4: Front-Leg Hamstring Stretch
Bring your left hand back to the floor, then shift your hips backward and straighten your right leg. Flex your front foot so your toes point toward the ceiling, and fold gently over the extended leg. You will feel a deep but pleasant pull behind your front thigh.
Meanwhile, keep a soft bend in the knee if your hamstrings are tight. Additionally, as a beginner regression, only straighten the leg halfway and keep both hands on blocks. Similarly, as a progression, pull your toes toward your shin while folding deeper, which adds a calf stretch at the same time.
Part 5: Hip Flexor and Quad Release
Bend your front knee again to return to the lunge, then drop your back knee to the floor. Tuck your tailbone slightly and squeeze your back glute as you press your hips gently forward. Finally, reach both arms overhead to lengthen the entire front line of your body.
Indeed, this part feels wonderful after long hours of sitting. Additionally, as a beginner regression, place a folded towel under your back knee and keep your hands on your front thigh. Similarly, as a progression, lift your back foot toward your glute and hold it with the same-side hand for a deep quad stretch.
Part 6: Stand Tall and Reset
Step your back foot forward to meet your front foot and roll up to standing. Reach both arms overhead, take one full breath, and then step the left foot forward to begin the whole sequence on the other side. Indeed, that standing reset matters more than it looks, because it trains your balance and teaches your body to carry the new mobility upright.
Additionally, as a beginner regression, use a wall or sturdy chair for balance as you stand up. Similarly, as a progression, rise slowly through a reverse lunge instead of simply stepping your feet together.
Once you finish both sides, you have completed one full round. When warming up, two rounds per side is usually plenty. Consequently, the entire drill takes about five minutes from start to finish. And if you like following along with a visual walkthrough, Tom’s Guide also has a helpful step-by-step photo guide.
Beginner Regressions: Make the World’s Greatest Stretch Work for You
If the full sequence feels like too much right now, that is completely normal. Nevertheless, almost everyone needs a simpler entry point, and there is no shame in starting there. The following regressions let you practice the world’s greatest stretch at any fitness level.

Elevate your hands. Place both hands on a sturdy chair, a low table, or yoga blocks instead of the floor. Indeed, this single change makes the lunge and rotation dramatically easier, and therefore it is the best first adjustment for stiff beginners.
Shorten the lunge. Also, you do not need a huge stride to get the benefits. Indeed, a shorter stance protects your knees and lets you focus on form. Finally, lengthen the step gradually as your hips open up over the coming weeks.
Skip the rotation at first. When twisting feels unstable, simply hold the deep lunge and the hamstring fold. Additionally, you can add the rotation back in once your balance improves. After all, there is no rule that says you must do all six parts on day one.
Do it from half-kneeling. Instead, start in a half-kneeling position with your back knee on a cushion, then work through parts two through five from there. Similarly, seniors and anyone with knee sensitivity often find this version far more comfortable.
Reduce the range. Instead, move only through the portion of each shape that feels like a gentle stretch, never pain. Consequently, your body learns to trust the movement instead of guarding against it.
Progressions to Challenge Advanced Movers
Once the basic sequence feels easy, you can raise the difficulty without adding time. Moreover, these progressions keep the drill challenging even for experienced athletes.
Add loaded reaches. Firstly, hold a light dumbbell or water bottle in your top hand during the rotation. The extra weight deepens the thoracic opening. Additionally, it strengthens the small stabilizer muscles around your shoulder.
Slow the tempo. Secondly, take a full five-count to move into each position and a five-count to move out. Consequently, this tempo work builds strength through the entire range of motion. Moreover, it turns a mobility drill into genuine strength training.
Link both sides without standing. Instead of standing up between sides, step directly from one lunge into the next. Consequently, your heart rate climbs and the sequence becomes a legitimate conditioning circuit.
Add a deep squat transition. After finishing one side, sink into a deep squat before stepping into the opposite lunge. Indeed, this addition connects the hip mobility of the stretch with full squat depth. However, only try this once your ankles and hips feel ready.
Common Mistakes to Avoid
Holding your breath. When rotating, many people tense up and forget to breathe. Instead, exhale as you twist and inhale as you return. Indeed, steady breathing is what allows your muscles to release.
Rounding the lower back. When you fold over the straight front leg, it is tempting to round your spine to reach farther. Instead, keep your chest proud and hinge from the hips. Consequently, you will feel the hamstring stretch more, and your back will thank you.
Letting the front knee cave inward. Firstly, watch that your front knee tracks over your second and third toes. When it collapses, shorten your stance or elevate your hands. After all, good alignment matters more than depth.
Rushing through the shapes. Move slowly enough to feel each position, especially the rotation. Otherwise, speed turns a mobility drill into sloppy lunges. Thus, quality always beats quantity here.
Skipping one side. Indeed, it feels natural to favor your more flexible side. However, imbalances grow when you do, so always complete both sides equally.
When and How Often to Do the World’s Greatest Stretch
Indeed, the most popular use is as a pre-workout warm-up, and for good reason. Two flowing rounds take about five minutes and prepare nearly every joint you will use. If you want to get even more out of your warm-ups, our guide to 7 Ways to Get More Out of Your Warm-Up Exercises pairs perfectly with this drill.
Also, it shines as a morning movement snack. When you wake up, doing one slow round loosens the stiffness that builds overnight. Similarly, a midday round at your desk can reset posture between long meetings.
After training, slow the tempo and hold each shape for 20 to 30 seconds. Meanwhile, in this slower form, the sequence doubles as a cooldown and flexibility session. Additionally, for a broader plan, you can read Stretching Before Workout: What to Do, What to Avoid, and What Actually Works to understand when dynamic drills like this one beat static holds.
So, how often should you do it? When possible, practice daily, because the benefits compound with consistency. However, even three sessions per week will noticeably improve your hip and upper-back mobility within a month.
FAQs About the World’s Greatest Stretch
How long should I hold each position in the world’s greatest stretch?
When warming up dynamically, hold each of the six positions for about five to seven seconds while moving smoothly between them. Indeed, physical therapists recommend this timing because it raises tissue temperature without dulling your power. However, for a flexibility-focused session, hold each shape for 15 to 30 seconds.
Is the world’s greatest stretch good for beginners?
Indeed, it is great for beginners, as long as you use the regressions in this guide. Firstly, start with elevated hands, a shorter lunge, and the back knee down. Additionally, skip any part that causes joint pain. Indeed, most beginners feel comfortable with the full sequence within two to three weeks of regular practice.
Can the world’s greatest stretch replace my entire warm-up?
When your workout is light to moderate, it can cover most of your needs. After all, it moves your ankles, hips, spine, and shoulders through generous ranges. However, for heavy lifting or sprinting, add a few minutes of movement-specific drills afterward, such as bodyweight squats or leg swings.
How many rounds should I do?
Two rounds per side is the sweet spot for most people, which takes roughly five minutes. When you are very stiff, do three slow rounds and focus on breathing. Finally, as a daily maintenance habit, even one unhurried round makes a meaningful difference.
Is it safe if I have back or hip pain?
When dealing with general stiffness, it is usually helpful, but sharp or radiating pain is a different story. Therefore, stick to the gentlest regressions, keep every movement pain-free, and stop if symptoms worsen. When in doubt, check with a physical therapist before continuing.
Conclusion
Indeed, the world’s greatest stretch earns its bold name by doing what a dozen isolated stretches cannot: it links your hips, hamstrings, spine, and chest into one flowing five-minute sequence. Thus, you now know all six parts, plus the beginner regressions and advanced progressions that make the drill work for every body.
Instead of waiting for the perfect moment, start where you are, even if that means hands on a chair and a short lunge. Moreover, consistency matters far more than depth, and a little daily practice will change how your whole body feels within weeks. Finally, for a complete daily plan to build on this habit, explore our Full Body Mobility Routine You Can Do Every Day.
So, roll out your mat, take that first deep lunge, and give your body the five minutes it deserves. Your hips, back, and future self will be glad you did.
