


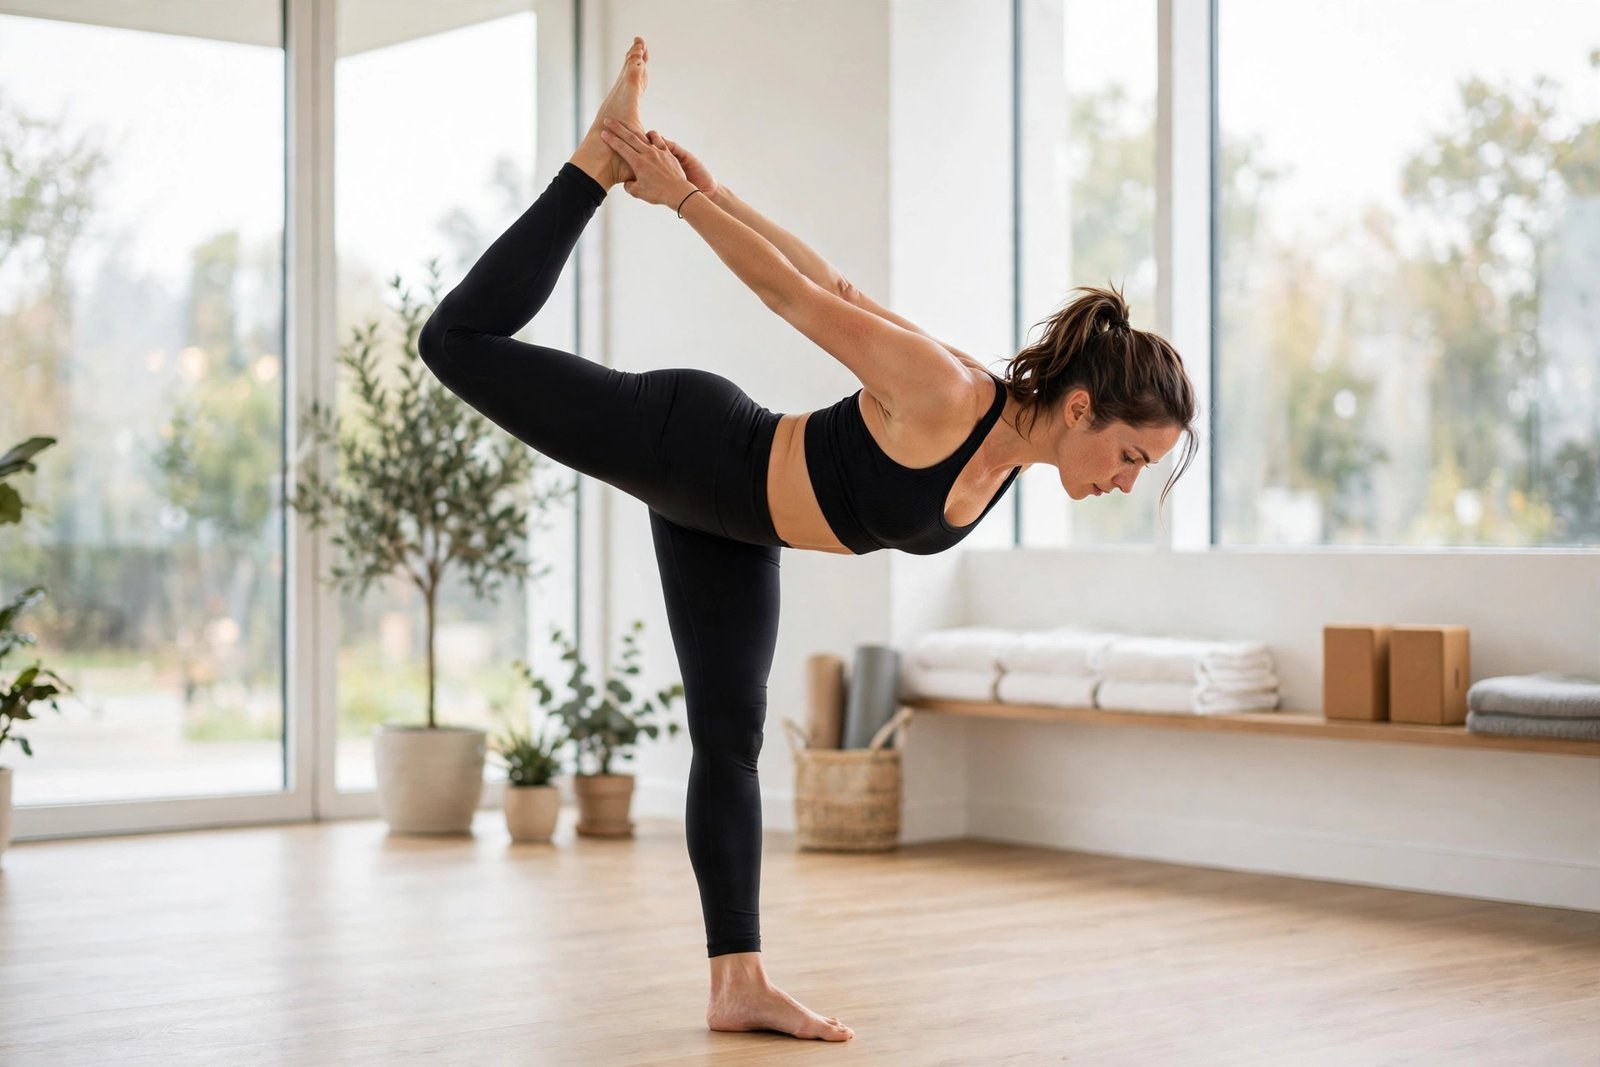
Picture a dancer folding forward over one standing leg. Her other leg rises straight toward the sky. That is the needle pose — graceful, strong, and totally learnable. This guide to needle scale pose how to do it gives you a safe path forward. First, you will master dancer pose. Then you will progress step by step to the full needle.
You do not need a dance background to learn this pose. However, you do need patience and the right preparation. Therefore, we will start with the foundations and build up gradually. In addition, you will get alignment cues, a warm-up routine, and the most common mistakes to avoid. By the end, you will know exactly what to practice each day.
Why the Needle Pose Belongs in Your Practice
The needle pose is one of the few poses that builds strength and flexibility at the same time. Your standing leg works hard to keep you upright. Meanwhile, your hamstrings and hip flexors lengthen under load. As a result, you build flexible strength that transfers to sports, dance, and everyday movement.
It also sharpens your balance in a big way. Balancing on one leg while folding forward challenges your focus. Indeed, many people find their concentration improves both on and off the mat. Finally, the pose rewards consistency — small weekly gains in hamstring length show up quickly here.
Here is what regular practice develops:
- Single-leg strength. Your standing glute and calf learn to stabilize under real load.
- Active hamstring flexibility. The lifted leg opens your hamstrings while they work, not while they are passive.
- Hip flexor length. The back leg’s hip flexor stretches every time you lift high.
- Spine decompression. Hanging the torso forward gently traction the lower back.
If you already train for the splits, this pose fits your program beautifully. It demands the same hamstring and hip-flexor openness. Moreover, the balance challenge keeps your practice interesting on days when floor stretching feels monotonous. For a full roadmap on that goal, read our guide on how to do the splits alongside this one.

Needle Scale Pose How to Do It: The Step-by-Step Progression
Now comes the fun part. The needle pose is really a combination of three skills you may already know: dancer pose, a standing split, and a calm forward fold. This needle scale pose how to do method works because each stage builds the strength and flexibility the next one needs. Therefore, we will learn each stage separately and then blend them. First, give yourself four to six weeks for the full journey. However, many people feel real progress in just two weeks.
Stage 1: Master Dancer Pose
Start by standing tall with your feet together. Shift your weight into your right foot. Then bend your left knee and catch your left foot with your left hand. Keep your knees close together as you lift the foot behind you.
Now lean your torso slightly forward and reach your right arm ahead. Imagine your chest and lifted leg balancing like a seesaw. Hold for five to eight breaths, then switch sides. In addition, practice this daily — dancer pose builds the exact balance and hip-flexor opening the needle needs.
If dancer pose feels shaky, hold a wall or chair with your free hand. There is no shame in support. Indeed, even experienced yogis use a wall while learning. Consequently, your nervous system learns the shape faster when you feel safe.
Stage 2: Build a Stable Standing Split
Next, fold forward and place your hands on the floor or a block. Shift your weight into your right leg. Then slowly lift your left leg behind you, keeping both legs straight. Stop where your hamstrings feel challenged but not strained.
At first, your lifted leg may only reach hip height. That is completely fine. For example, many strong practitioners started exactly there. Keep your hips square to the floor. Also, press firmly through your standing foot for stability.
For extra form detail, the standing split guide from Yoga Journal shows useful alignment cues for this stage. Similarly, working on your front splits stretch on the floor will speed up your progress here.

Stage 3: Blend It Into the Full Needle
Now we combine the two stages. From a forward fold, shift your weight into one leg. Lift the other leg high behind you while your torso drapes toward the floor. Let your head hang heavy. Reach your hands toward the floor, a block, or your standing ankle.
The magic cue is this: think of folding, not kicking. If you kick the leg up aggressively, you will lose your balance. Instead, hinge deeper at the hips and let the leg float up. As a result, the pose feels smooth instead of forced. This is the moment the whole needle scale pose how to do progression has been building toward — enjoy it.
Hold the full needle for five to ten breaths per side. Then come down slowly with control. Finally, rest in a gentle forward fold before switching legs. Do not rush the exit — a controlled exit protects your lower back.
Needle Scale Pose How to Do It Safely: 5 Alignment Cues That Matter
Good alignment keeps the needle pose safe and makes it look effortless. Therefore, run through these five cues every time you practice. First, read them slowly. Then apply them one at a time in your next session.
- Square your hips. Point both hip bones toward the floor. When the lifted leg’s hip opens to the side, you lose the hamstring stretch. In addition, square hips protect your lower back.
- Keep the standing leg micro-bent, not locked. A soft knee engages your muscles instead of hanging on the joint. Consequently, your balance improves and your knee stays happy.
- Lengthen before you lift. Extend your spine forward first, then let the leg rise. If you lift before you lengthen, your back rounds. Indeed, this one cue fixes most wobbly needles.
- Relax your neck and jaw. Tension creeps upward when you concentrate. Therefore, consciously soften your face. A relaxed upper body helps your whole body balance better.
- Breathe into the stretch. Use slow exhales to settle deeper into the fold. Never hold your breath. As a result, your muscles release instead of guarding.
A gentle backbend practice pairs well with this forward-fold work. It keeps your spine balanced in both directions. In addition, filming yourself from the side once a week is a great habit. You will spot hip-opening and knee-locking habits you cannot feel yet. Our backbend stretch guide covers safe spinal opening you can add on alternate days.
Warm Up First: A 15-Minute Needle Prep Sequence
Never attempt the needle cold. A proper warm-up makes the pose safer and noticeably easier. Therefore, run through this fifteen-minute sequence first. It targets exactly the muscles the needle demands.
- March in place — 2 minutes. Lift your knees high and swing your arms. This raises your core temperature. Consequently, your muscles become more elastic.
- Leg swings — 1 minute per side. Hold a wall and swing one leg forward and back. Start small and build range gradually. In addition, keep your torso tall.
- Low lunge — 2 minutes per side. Sink your hips forward and down. Tuck your tailbone slightly to feel the hip flexor stretch. For instance, place your back knee down if the full lunge is too intense.
- Half split — 2 minutes per side. From the lunge, straighten your front leg and fold over it. Flex your front foot. This directly opens the hamstring you need for the needle.
- Dancer pose holds — 1 minute per side. Revisit Stage 1 while you are warm. Notice how much steadier you feel now. Finally, finish with two slow standing splits per side.
By the time you finish, your hips and hamstrings will feel warm and awake. Then you are ready for the full needle. For more sequencing ideas, browse Yoga Journal’s sequence library.

Needle Scale Pose How to Do It Without Forcing: 6 Mistakes to Avoid
Most needle-pose problems come from rushing. Therefore, watch for these six mistakes in your own practice. Fixing even one of them can transform the pose.
1. Skipping the warm-up. Cold hamstrings resist lengthening and strain easily. Always complete the prep sequence above first. In fact, a good warm-up is the fastest shortcut there is.
2. Kicking the leg up. Momentum feels like progress, but it is not. A kicked leg usually means an arched back and lost balance. Instead, fold deeper and let the leg float. As a result, you build real control.
3. Letting the hips open. When the lifted leg’s hip rotates open, the hamstring stretch disappears. Meanwhile, the lower back takes the load. Keep both hip points facing the floor, even if the leg stays lower.
4. Locking the standing knee. A locked knee shifts the work to your joints instead of your muscles. Keep a micro-bend. Consequently, your standing leg gets stronger with every rep.
5. Rounding the spine to reach the floor. If your hands cannot reach the floor without rounding, use a block. There is no prize for touching the ground. Indeed, a long spine matters far more than hand placement.
6. Practicing only one side. It is tempting to favor your good leg. However, imbalances grow quietly over time. Therefore, always give both sides equal practice, even when one side feels clumsy.
If tight hamstrings are your main limiter, spend extra time with our front splits stretch routine on rest days. Similarly, our how to do the splits guide lays out a longer-term flexibility plan. And for spinal balance, the backbend stretch guide keeps your backbend and forward-fold strength even. Finally, remember that this needle scale pose how to do plan rewards patience far more than intensity.
Needle Scale Pose How to Do: Your Questions Answered
Here are the questions readers ask most about the needle scale pose how to do progressions. If yours is not covered, start with Stage 1 and let your body guide the pace.
Is the needle pose safe for beginners?
Yes, when you follow the progression. The pose itself is advanced, but the stages are beginner-friendly. Start with dancer pose and the standing split. Moreover, use a wall for balance until you feel steady. Stop if you feel sharp pain anywhere.
How long does it take to learn the needle pose?
Most people need four to eight weeks of consistent practice. However, your timeline depends on your starting hamstring flexibility. If you can already touch your toes comfortably, you may progress faster. In addition, practicing three to four times per week speeds things up considerably. That said, this needle scale pose how to do timeline assumes steady, patient sessions — not rushed ones.
What if my hamstrings are very tight?
Then the needle becomes a wonderful long-term goal, not a this-week project. Spend most of your time on the half split and standing split stages. For example, two months of dedicated hamstring work can add surprising range. Patience here always pays off.
Should the lifted leg be perfectly vertical?
Not at first, and honestly not ever for most people. A vertical leg is the advanced expression. Meanwhile, a strong diagonal line with square hips is already an excellent needle. Therefore, chase alignment first and height second.
What muscles does the needle pose work?
The standing leg’s glutes, calves, and foot muscles work the hardest for balance. Meanwhile, the lifted leg’s hamstrings and glutes engage to hold it high. In addition, your core fires constantly to keep you stable. As a result, the needle is a genuine full-body strength pose, not just a stretch.
Can I practice the needle pose every day?
Gentle daily practice is fine once you know the shape. However, skip the deepest version on consecutive days at first. Your hamstrings need recovery time to adapt. In fact, alternating hard and easy days builds flexibility faster than going all-out daily.
Why do I keep falling over?
Falling usually means your gaze or your standing foot is unstable. First, fix your eyes on one unmoving point on the floor. Second, spread your standing toes and grip the floor. Finally, slow down the entry — rushing in is the top cause of wobbles.
Conclusion
The needle pose looks like a gift, but it is really a skill. It rewards the same things every flexibility goal rewards: a smart progression, a real warm-up, and patient repetition. Follow the stages in this needle scale pose how to do guide. Respect the alignment cues, and your needle will rise a little higher each week.
Start today with just Stage 1. Hold dancer pose for a few breaths on each side. Then add the warm-up sequence tomorrow. Before long, you will fold forward, float that leg up, and wonder why it ever looked impossible. Your practice is waiting — enjoy the climb.
