

Few stretches inspire as much devotion — or as much groaning — as the pigeon stretch. In addition, this deep hip opener targets the glutes, piriformis, and hip rotators in a way almost nothing else can. If you sit all day or your hips feel permanently locked, the pigeon stretch might become your new best friend.
But pigeon has a reputation for being intense, and done carelessly it can stress the knee. In addition, this guide shows you how to do it safely, with smart modifications for every level. As a result, you will learn the classic form, beginner-friendly alternatives, and how to tell the difference between a productive stretch and a warning sign.
Whether you are a runner with cranky hips, a desk worker with a stiff back, or a yogi chasing deeper openness, here is everything you need to know.
What Is the Pigeon Stretch?
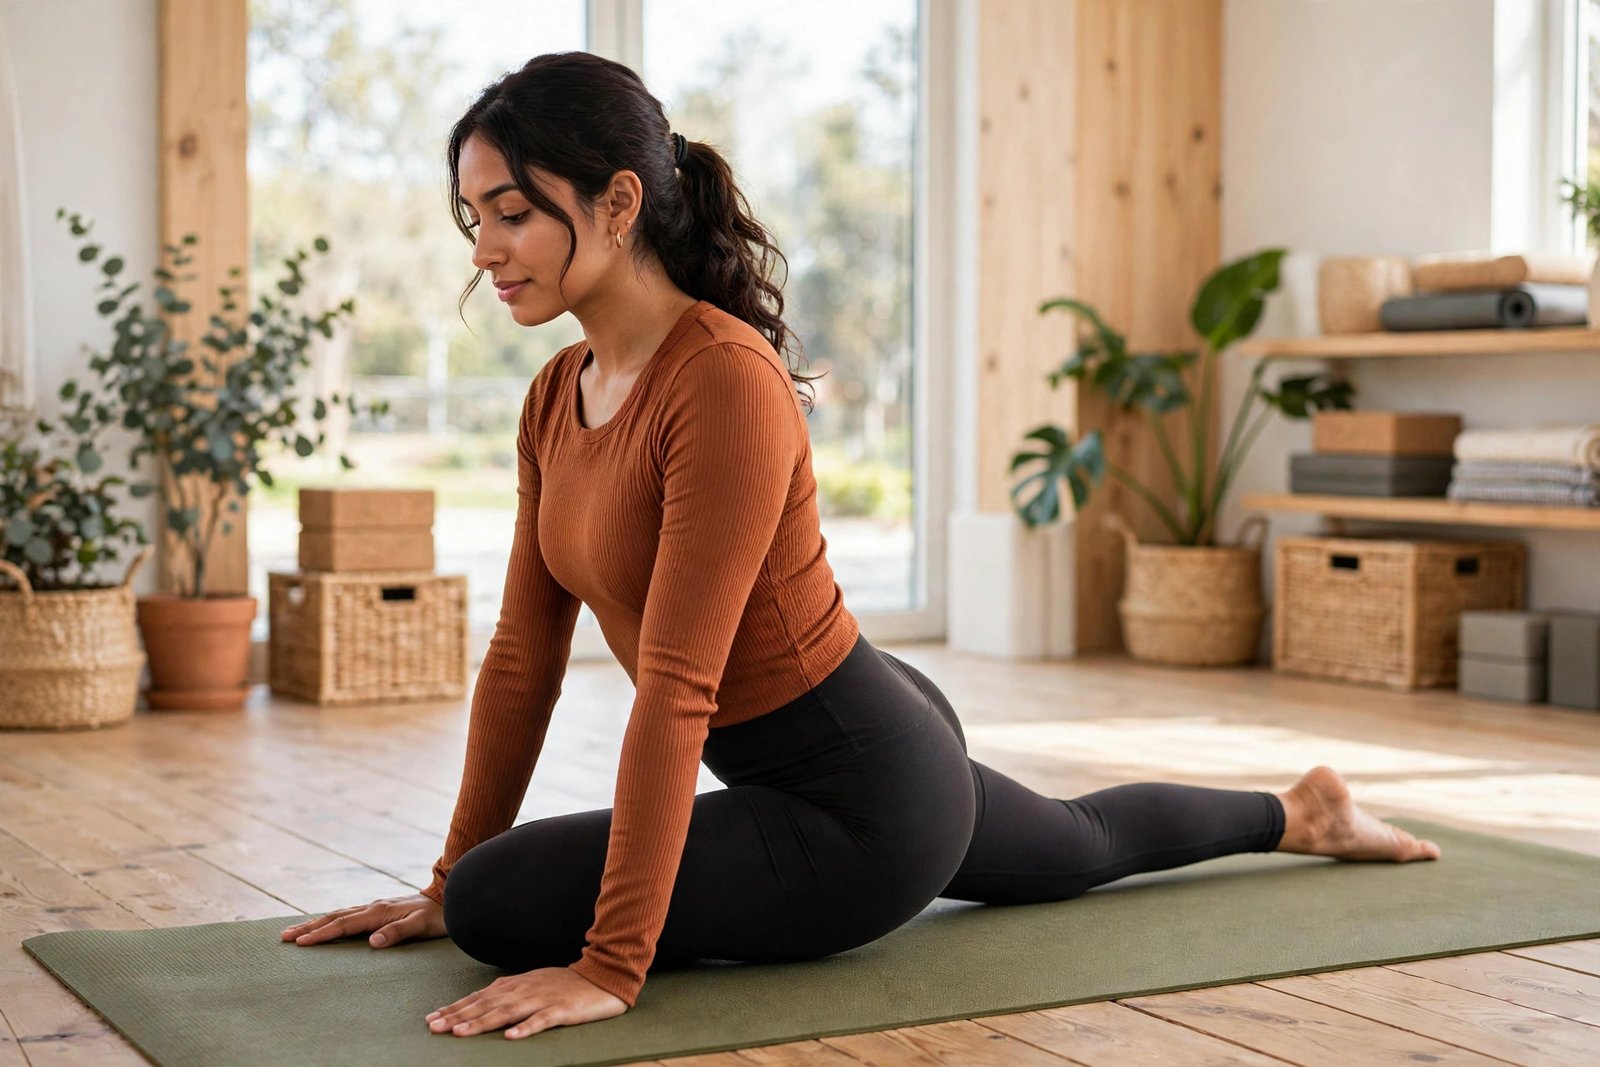
In fact, the pigeon stretch — pigeon pose (eka pada rajakapotasana) in yoga — is a deep hip opener performed with one leg folded in front and the other extended behind you. The front leg’s outer hip gets a profound stretch while the back leg’s hip flexor lengthens simultaneously.
In addition, it primarily targets the deep lateral rotators of the hip: the piriformis and the glute muscles. In addition, these small but mighty muscles control how your thigh rotates, and they tighten relentlessly from sitting, driving, and even running.
In addition, this article is your hub guide to the classic pigeon. If you want a gentler elevated version, see our elevated pigeon pose guide — and note that the standing variation gets its own dedicated article.
Why the Pigeon Stretch Works So Well
In fact, the magic of pigeon is leverage. With your body weight pressing the front hip toward the floor, gravity provides a deep, sustained stretch that is hard to replicate any other way. Few poses access the piriformis as directly.
That matters because a tight piriformis causes outsized trouble. In addition, it can contribute to sciatic-like symptoms, hip pinching, and that deep buttock ache runners know too well. Releasing it often brings surprisingly fast relief.
Pigeon also addresses the front-back imbalance of modern life. The back leg stretches the hip flexors — chronically short from sitting — while the front leg opens the glutes. One pose, two of the tightest areas in the body.
As Liforme’s pigeon pose guide notes, proper alignment — especially keeping the hips square — is what separates a great stretch from a sketchy one. In fact, that principle runs through everything below.
How to Do the Pigeon Stretch: Step by Step
Start on all fours. Precision here matters more than depth, so read each step before you begin.

1. Then, bring the front knee forward. Slide your right knee toward your right wrist. Angle your right shin so the foot rests somewhere between your left wrist and your left hip — wherever feels tolerable. Also, do not force the shin parallel to the mat.
2. Then, extend the back leg. Slide your left leg straight back, top of the foot pressing into the floor. Also, keep the back foot pointing straight behind you, not curving inward.
3. Square your hips. This is the crucial cue. Then, lower your right hip toward the floor without dumping all your weight onto that side. If the hip hovers high, slide a folded blanket or block underneath it for support.
4. Lengthen, then fold. First sit tall with hands on the floor, lengthening your spine. If that feels fine, walk your hands forward and fold over the front leg. Then, rest on your forearms or a pillow.
5. Also, breathe and hold. Stay for one to three minutes per side, breathing slowly. In fact, the sensation should be intense but never sharp. Come out the way you came in, then switch sides.
Beginner Modifications (Start Here)
If the full pose feels like too much, you are in good company. In addition, these modifications deliver most of the benefit with far less intensity.
Prop under the hip. A block or firm cushion under the front-leg hip is the single best modification. It levels your pelvis and removes the “hanging” strain that makes beginners grip instead of release.
Figure-four on your back. Lie down, cross one ankle over the opposite knee, and gently pull the bottom leg toward you. You get the same outer-hip stretch with zero knee risk and full back support. Indeed, this is the safest starting point for sensitive knees.
Keep the front foot closer. The nearer your front foot is to your groin, the gentler the stretch. Also, start tucked in close and only slide the foot outward over weeks as your hips open.
In fact, there is no shame in any of these. In fact, the yogis with the deepest pigeons almost all started exactly here. For a full foundation in safe stretching, our beginner’s stretching guide pairs well with this pose.
Muscles Worked and Benefits
In fact, the primary targets are the piriformis, gluteus medius, and gluteus maximus of the front leg, plus the hip flexors and psoas of the back leg. Secondary benefits reach the lower back, which often relaxes once the hips stop pulling on it.

Practitioners report relief from deep glute tightness, easier sitting and walking, and better performance in squats and lunges. The pose also doubles as a stress reliever — long holds with slow breathing calm the nervous system noticeably.
Over weeks, expect your front hip to sit lower with less propping, your stride to feel freer, and that nagging outer-hip ache to fade. Also, progress photographs, taken monthly from the same angle, tell the story beautifully.
Common Mistakes to Avoid
Forcing the front knee. The most dangerous mistake is cranking the front shin into a parallel position before the hips are ready. Knee pain in pigeon almost always comes from this. Also, let the shin angle be whatever your hips allow today.
Collapsing onto one hip. Dumping all your weight onto the front-leg side twists the sacrum and loads the knee unevenly. Also, keep weight balanced, prop the hip up, and think “long spine” before “low hip.”
Holding your breath. Deep hip work triggers a guarding reflex; bracing makes it worse. Slow exhales are the tool that convinces your nervous system to release. If you cannot breathe calmly, you have gone too deep.

Skipping the second side. Everyone has a “good” hip. In fact, the stiff side needs the work more, not less. Then, give both sides equal time — or even a little extra to the tight side.
General stretching wisdom applies too: warm up first, never stretch into sharp pain, and stay consistent. Healthline’s stretching overview reinforces that gentle, regular practice outperforms occasional intensity.
How to Program Pigeon Into Your Week
Two to four sessions per week is plenty. Also, hold one to three minutes per side after workouts or in the evening. In addition, it pairs naturally with hip flexor stretches and glute bridges for a complete hip session.
A simple template: five minutes of gentle movement (leg swings, hip circles), then pigeon on each side, then a figure-four or reclined twist to finish. Ten to fifteen minutes total, and your hips will feel reborn.
Track progress by noting how much propping you need under the front hip. When you need less height, you are winning. Also, combine this with our hip mobility exercises for a comprehensive hip program.
Frequently Asked Questions
Why does pigeon pose hurt my knee?
Knee discomfort usually means the front shin is angled too aggressively or the hip is unsupported. Then, tuck the foot closer, prop the hip higher, or switch to the figure-four-on-the-back version until the hips open more.
How long should I hold pigeon pose?
One to three minutes per side is the sweet spot. Beginners should start with 30 to 60 seconds. Longer holds (up to five minutes) suit restorative practice once the position feels comfortable.
Is pigeon stretch good for sciatica?
In addition, it can help when piriformis tightness contributes to sciatic-like symptoms, which is common. But true sciatica has many causes — if you have shooting pain, numbness, or weakness, see a clinician before stretching aggressively.
Can beginners do pigeon stretch?
Yes, with modifications. In fact, the figure-four on your back and the propped-up pigeon are genuinely beginner-friendly. In fact, the full unpropped pose is intermediate — earn it gradually.
Should my front shin be parallel to the mat?
Not necessarily. Indeed, that is an advanced expression, not a requirement. Any angle between your wrist and your hip that feels like a deep but safe hip stretch is correct for your body today.
Pigeon vs. figure-four stretch — which is better?
They target the same muscles. Pigeon gives a deeper stretch with body weight; figure-four is gentler and safer for knees. Also, use figure-four to build up, pigeon when you are ready — or both in the same session.
Can I do pigeon every day?
Gentle daily pigeon is fine once the pose feels comfortable. While building up, give the hips a rest day between deeper sessions so the tissue can adapt.
Conclusion
In fact, the pigeon stretch earns its legendary status: no other common pose opens the deep hip rotators quite like it. Done with square hips, honest props, and patient breathing, it transforms cranky hips into supple ones.
Then, start where you are — figure-four, propped pigeon, or the full expression — and give it a few weeks. In fact, your hips have been waiting for this. Meet them there, one slow exhale at a time.
